Oval Accent Big Clear die treat holder.
Leave a comment below if you’d like a copy of the FREE PDF tutorial
One of the fabulous perks of being a Stampin’ Up! demonstrator is the free products, and last month I was very spoilt with lots of goodies from the Annual and Christmas Holiday catalogues (Australia/NZ). One of the free items was this Oval Accent Bigz Clear die.

…And from the moment I took it out of the box I KNEW I wanted to make these treat holders. They also fit perfectly with this week’s Create With Connie & Mary favour challenge CCMCHOL12-03.

I started putting together a tutorial for my blog, but it was getting VERY long. It’s not that it’s a difficult project, but I took lots of photos which made the tutorial quite lengthy and my blog wasn’t playing nicely with all the images. Soooo…. I’m in the process of creating a FREE PDF with full instructions.
Would you like a copy?
Just leave a comment below and I’ll send it to you!
UPDATE 30th Sept 2012: The 9 page tutorial is done! Yay! If you’ve left a comment requesting a copy, please check your inbox because the tutorial should be there waiting for you. Let me know if it hasn’t turned up. Enjoy!
UPDATE 30th Oct 2012: I’m still sending out the tutorial to those who request it – remember it’s a large file so if you haven’t got it within a couple of days please let me know.
While you’re here, why not subscribe to receive blog updates by email.
Happy stamping,

Oval Accent Bigz Clear die treat holder
Tags: CCMCHOL12-03, Cherry Cobbler tulle, Heart of Christmas, Oval Accent Bigz Die, stampin' up!, treat holder

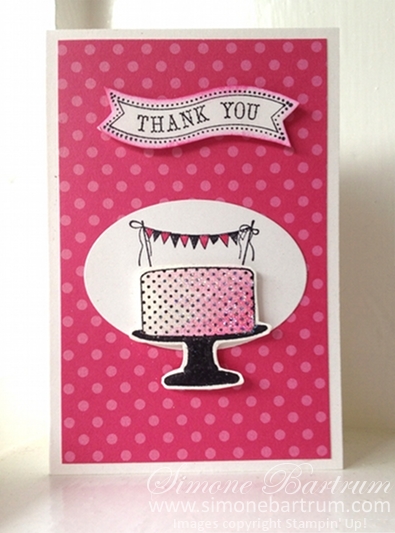
All Stampin' Up!: Make a Cake stamp set (p44 Annual Catalogue), Itty Bitty Banners (p134), Bitty Banners Framelits Dies (p191), Dazzling Diamonds, Melon Mambo, Extra Wide Oval Punch, StazOn black, Brights Paper Stack
The Itty Bitty Banners stamp set and Bitty Banners Framelits Dies are an awesome pair. A perfect match, no less.


Time-Saving Tip:
1. Stamp a sheet of sentiments from Itty Bitty Banners in your favourite ink colours. Allow enough room between stampings for the Framelits to fit.
2. Line up all three Bitty Banner Framelits over their matching images. If you're new to Framelits, click here for my Top 3 Framelits Tips.
3. Ta-daaaa….With one roll of the Big Shot you'll have a 'Happy Birthday', a 'For You' and a 'Thank You' image all cut out and ready to use on future projects.
I have an empty brads container on my desk with a handy stash of stamped and die cut sentiments in a variety of colours. Definitely makes life easier.
It's good to know the Bitty Banner Framelits also work perfectly with the ribbons on the Blue Ribbon stamp set (p33)!
Happy stamping,
www.simonebartrum.com
Tags: Bitty Banners, Make a Cake

If you've been studying the Christmas holiday catalogue as much as I have, these snowflake cards might look familiar!
Hint: Check out page 14 of the Christmas catalogue.
These were one of the fun projects we made at a Stampin'Up! party on the weekend.

Love that silver Glimmer Paper! Soooo sparkly.
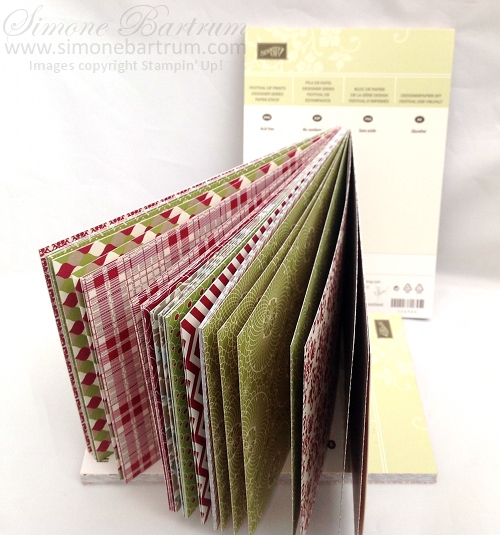
I modified my version a little (as we do!) by using the Confetti stamp set in the background and also adding a touch of Dazzling Details. The Festival of Prints DSP stack is AWESOME if you have a Big Shot… just tear off a sheet and pop it straight onto your die. At 4 1/2" x 6 1/2" inches (11.4cm x 16.5cm) each page, they are the PERFECT size for die-cutting on the run, as a photo mat for scrapbooking, cardfront embellishment and other kinds of papery goodness. Very cool.

Full free downloadable instructions for this Snowflake card are in this month's newsletter.
TIP: If you don't currently have a Stampin' Up! demonstrator, why not subscribe to our free monthly newsletter? News, tips and inspiration delivered straight to your inbox. Just enter your email address in the box over there at the top of the right sidebar, then hit 'go'. Viewing this in a reader? Click here first.

Happy stamping,
Tags: festival of prints designer series paper stack, snow flurry, snowflake card