Hi stampers.
Today I’m sharing a simple little project made with the NEW tool available from Stampin’ Up!: the Circle Scissors Plus. With this tool you can cut out circles up to 6 inches in diameter, you can cut rings and….. it also draws circles because it comes with a marker attachment!
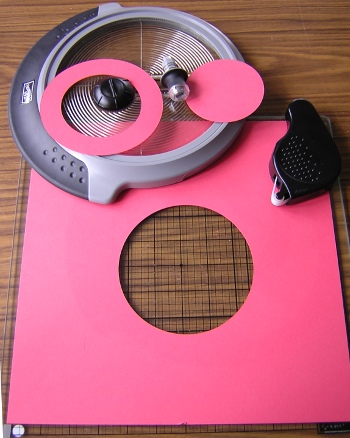
It took just a little practice for me to get used to it, but it really does work well. I love how it can cut out rings to make perfect little frames for scrapbook pages and Off The Page projects.
For best results:
– Use with a glass cutting mat (such as the one in the Summer Mini catalogue) to prolong the life of the blades
– Use a little bit of Dotto repositionable adhesive to hold the cardstock in place.
– When cutting rings, always cut the inner circle first. Then – without moving the cardstock or circle cutter – adjust the measurements and continue cutting.
– The markers work beautifully with the this tool. Just insert the marker into the Marker Attachment, so the tip of the marker is *just* sticking out, then tighten the grip so the marker is held firm.
– Use a light touch (thanks for Steph and the other demos on the ESAD-SU forum for Stampin’ Up! demonstrators for helping me with this technique tip). If you push too firmly the cutter might slip. Easy does it.
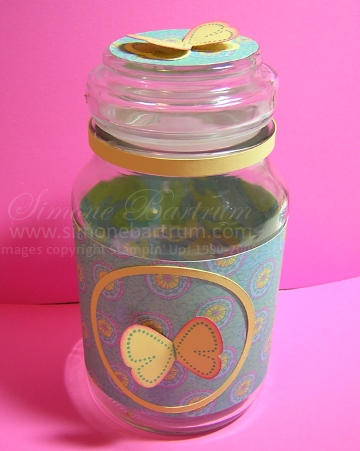
Today’s project features a glass jar that has been lying around my house for a while, and I thought I’d try to pretty it up. In addition to using the Circle Scissors Plus to make this project, I also used the gorgeous Kaleidoscope DSP and the new butterfly punch.

Happy stamping,

Hello stamping friends,
Hope you’ve all had a wonderful weekend, and ready to face the week ahead. If yours is anything like mine, the Christmas activities are well and truly happening and you can just FEEL that the year is coming to an end. It’s a special time.
I meant to post this card yesterday but it fell off the page. This time I’ve filled the cup with chunky glitter.
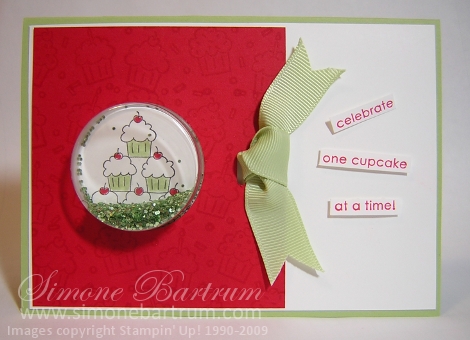
Oooooh I just love these things! In fact, I love them so much I’m giving them away!!
Every hostess who books a workshop with me for January will get 12 Sweet Treat Cups for FREE*. This is in addition to all the usual benefits that hostesses are treated to, both from Stampin’ Up! and from me.
The free Sweet Treat Cups are an extra little "thank you" from me. I can’t wait to show you how to make projects like this one featured today, so contact me and we will make a booking at a time and place to suit you and your friends.
Tomorrow I’ll be continuing with highlights from the Summer Mini catalogue.
Happy stamping,
* This offer is open to all of my customers and hostesses, or those who don’t already have a Victorian Stampin’ Up! demonstrator.
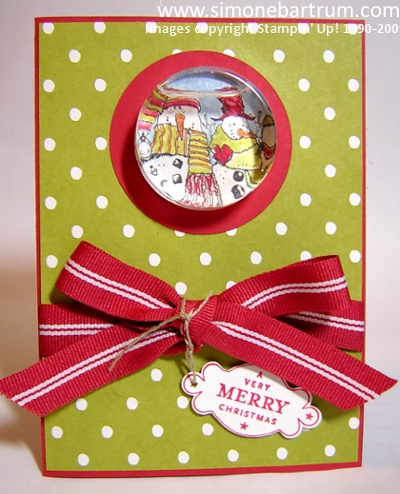
This is a fun card with a built-in snowglobe! Here we’ve filled the Sweet Treat Cup with water and about a quarter of a teaspoon of Dazzling Diamonds glitter. You can’t see that, though, because the glitter has all sunk to the bottom. But it’s there! I can’t wait to show my stamp club girls and hostess guests in the coming months. It is sooooo cool to watch (and play with) in person!
I learnt how to do this by watching Corinne’s video on her Stamping With Roxy website. Corinne is a SU demonstrator in Canada, and when I saw her make it I jumped up away from the computer and did it straight away (shhh, it was after midnight).
It’s watertight, hasn’t leaked a bit! Saying that, I wouldn’t send it through AusPost – might just be one of those special hand-delivered cards. What do you think?

Oh, I know you’re going to ask… the red frame was made with the Circle Scissors Plus – the BRILLIANT new tool in the Summer Mini Catalogue. More on that tomorrow 🙂
Happy stamping,