For all your
Stampin' Up!®
papercrafting needs,
Australia wide

Springtime Hello Frame Tutorial

Published by under 3D projects | Feb 12 2014

sth

Hi friends, thanks for visiting. My little creative corner has been crazy busy lately. We had our BIG team day on Saturday, so I was kind of off the grid for a while getting ready. It was a GREAT day! I have loads of photos from the event to share – they’ll be up soon. 


For today, I have a cute little project to keep you busy on a quiet weekend.


framedart_sb


HOW TO MAKE THE ‘SPRINGTIME HELLO’ FRAME

1. Find an old wooden picture frame. Remove glass and paint or whitewash the frame.

TIP: Visit Op Shops or garage sales to pick up a cheap frame. I got mine for $1 from the Barwon Heads All Saints op shop while we were camping nearby over the summer. 

totrans


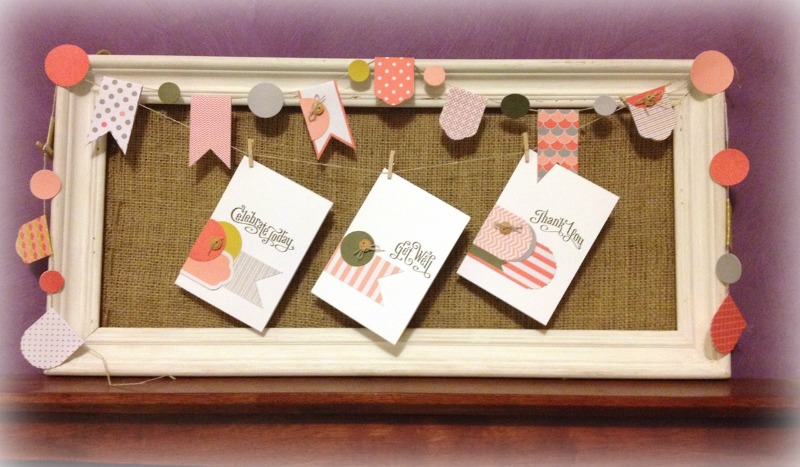
2. Paint the backing board OR replace it with burlap as I did on the one below.

My burlap came from one of the bags we got on last year’s Incentive Trip. You can see it in the third collage on this page, but you can pick up burlap fairly easily these days.

I used a staple gun to attach the burlap to the back of the frame. Pull it nice and tight. Check that the staples won’t show through.

frame


3. Use the Springtime Hello Simply Created kit to make an awesome garland! Everything you need is in the kit, and at only AU$15.95 I don’t think there could possibly be a simpler and more inexpensive way of putting together a garland.

KitContentsThe kit includes:

  • 3 metres of Natural Linen Thread
  • 5x mini clothespins
    (sooo cute)
  • 5 natural designer buttons
  • loads of adhesive-backed, pre-scored printed stickers to create your garland.


You can pin photos or other special items along the thread as you wish, and mix up the display whenever you want.

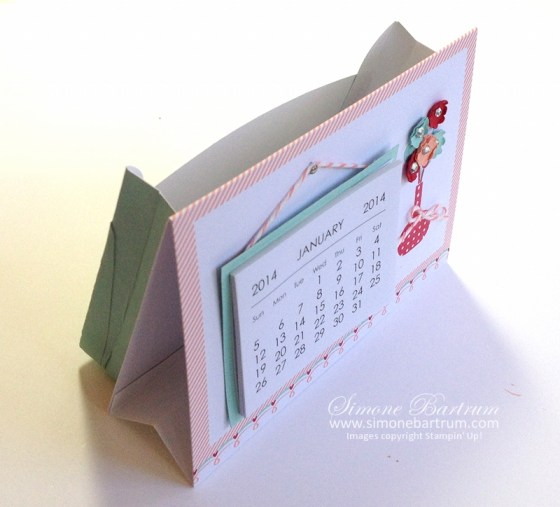
I had enough leftover stickers to make up about half a dozen cards.

burlapframe_sm

Order your Springtime Hello Simply Created Garland Kit here (delivered to Australian addresses).


So tell me, are you into the framed art or framed chalkboard look? Have you made anything like this, or is it still on your To Do list?

Leave a comment below. <3


Happy stamping,

Simone Bartrum, Stampin' Up! demonstrator Australia, Victoria


3 responses so far

Sale-a-bration & NEW Products!

Published by under catalogue | Jan 28 2014

kidsWelcome back! Today is the last day of school holidays, and the end of a busy summer of camping, surfing, swimming, melting in the 45 C degree heat, playing with the kids, and getting a new puppy…. Phew. Definitely time to get back to normality and, well, I can’t wait to get back to business too!

.

We’re kicking it off with THREE HUGE announcements today.


1. NEW PRODUCT: Texture Boutique

A brand new embossing machine is available from today. It’s smaller than the Big Shot, and its sole job is to emboss your beautiful projects! No die cutting through this one. And it’s only $49.95!

Check out the video below to see it in action….

.

2. SALE-A-BRATION IS HERE

Yes it’s that time of year, our annual Sale-a-bration event. But this time it’s even better because you get free products with every $90 purchase (not $100, like last year!). It’s a great time to join up or host a party too. You can download the SAB catalogue HERE.

SAB_SimoneBartrum

.

3. NEW OCCASIONS CATALOGUE

And if Sale-a-bration isn’t exciting enough, we also have a new 40-page catalogue to inspire, delight and shop from!

occassions_cover_widgetLove the new tools and punches and gold sequin ribbon and… well, pretty much all of it.

If you prefer to flick through pages of a real catalogue, just ask and I’ll pop one in the post for you (Australia only).

.

HOW TO MAKE THE MOST OF SALE-A-BRATION & THE CATALOGUE.

* Purchases from this new catalogue and/or the annual catalogue ALL go towards you earning FREE product the Sale-a-bration bonus. Just spend $90 from any catalogue (or combination of current catalogues) and choose a free item.

*Ask your friends if they need to stock up on craft supplies, or are looking for hot new products – we can pool the orders to earn you more hostess dollars!

celebrate

WHAT YOU WILL GET:

  • * Spend (or gather orders of) $90 from any catalogue/s
    and choose 1 FREE Sale-a-bration item.
  • * Spend (or gather orders of) $180 from any catalogue/s
    and choose 2 FREE Sale-a-bration items & handmade gift from me.
  • * Spend (or gather orders of) $270 from any catalogue/s
    and choose 3 FREE Sale-a-bration items & handmade gift from me.
  • * Spend (or gather orders of) $300 from any catalogue/s
    and choose 3 FREE Sale-a-bration items
    PLUS $50 in products of your choice FREE & handmade gift from me.
  • * Spend (or gather orders of) $400 from any catalogue/s
    and choose 4 FREE Sale-a-bration items
    PLUS $60 in products of your choice FREE & handmade gift from me.

.
BEST VALUE OF ALL:

  • *Spend (or gather orders of) $500 and choose
    5 FREE Sale-a-bration items
    PLUS $130 in products of your choice FREE.Wow wow wow wow. Definitely time to stock up on cardstock, adhesives and envelopes, digital downloads, plus a wish list full of fun new products. You’ll all join my elite shopper/hostess club and will receive handmade gifts and more during February and March 2014.


Ok well that’s a lot to take in for one day, isn’t it? Nothing like hitting the ground running. 🙂

CLASS SCHEDULE UPDATE: For those who’ve asked, I am still working on a class schedule, and have tentatively booked Saturday 22nd Feb for the first class. It will be an all occasions card making class. Cost $15. Please email me to express interest, and choose between a morning and afternoon session. Or you can leave a comment on my Facebook page and I’ll let you know how we’re going. Classes limited to 5 participants.

Have a fabulous day!

Simone Bartrum, Stampin' Up! demonstrator Australia, Victoria

No responses yet

Tutorial: Stampin’ Up! Sweet Sayings Calendar

Published by under 3D projects | Jan 04 2014

SweetSayings

sweet sayings desktop calendar

Stampin’ Up! Sweet Sayings Card & Envelope desktop calendar

.

As promised, I’m back today to share a sweet little desktop calendar project. This is one of the projects we’re making in my January parties and clubs, and they are heaps of fun to make. Practical, too!

Got any spare mini calendars lying around? If so, you can whip up one of these in under 10 minutes. You can also print out your own mini calendars – there are many options available online.

**I have a few spare kits left over. Read on to find out how you can get one of these ready-to-create kits – including the calendar – for FREE!**

This project uses the card base and envelope from the Sweet Sayings Card & Envelope pack that I shared earlier this week. It even has a pocket at the back for storing all those odds & ends that accumulate on our desks. 😉  Or is it just mine?

Calendar sweet sayings top view


Ok, so how do we do it?

Let’s start the clock.


1. First up, embellish the card front. It’s much easier to do this now, before we turn it into a stand-up calendar.

I used Stampin’ Up!’s Bright Blossom stamp set on mine, with flowers punched from the Itty Bitty Punch Pack. I also added a Pool Party mat behind my calendar and attached bakers twine before hanging it from a mini silver brad.

Calendar sweet sayings flowers

.

2. Cut white cardstock to 12.7cm (5 inches) x 6 cm. Score at 1cm, 3cm and 5cm, creating a concertina fold.

Adhere flaps to the inside front and inside back of the card using Sticky Strip, to create a base. This will prevent the card from ‘walking’ (ie. when the front and back move apart). We don’t want our calendar to collapse on us over time!

score base

Adding this base makes the calendar stand up, nice and sturdy. And you can even pop a pen in there!

Here you go, this picture might make it a bit clearer…

Calendar top side

3. Ok, now for the pocket.

Choose one of the envelopes that come in the Sweet Sayings Card & Envelope pack.

Sweet Sayings Stampin Up

Remove the flap. We won’t be needing it. 🙂

pocket trim flap

Now score the remaining three sides at 1cm. Be gentle! Don’t tear the paper.

pocket score lines

Put your hand inside the envelope and carefully flatten the sides. Add glue dots to secure the bottom corners underneath.

Now you can attach the pocket to the back of your calendar!

pocket

Would you like one of these ready-to-assemble kits?

I’ll pop one in the post for FREE, along with your thank you card, to the first six people who make a $30+ purchase from my Stampin’ Up! online shop this month. (Australian orders only)

   Calendar sweet sayings

Thanks for stopping by and don’t forget to leave me a comment <3!

Happy stamping,

Simone Bartrum, Stampin' Up! demonstrator Australia, Victoria

12 responses so far

  • This is me! Simone Bartrum, Australian Stampin' Up! demonstrator since 2007.
  • Simone Bartrum
    Australia
      0411 642 038

  • Welcome to my online home where I share a love of cardmaking, hand-crafted home decor and rubber stamping. Grab a cuppa and click around!

  • Would you like something you see here? 
    If you're in Australia, come browse my online store.

  • Questions or comments?

  • 2025
    Sales Award Top 10 AU
    Australian Top Performer
    Incentive Trip Achiever

  • 2024
    Sales Award Top 10 AU
    Incentive Trip Achiever
    Team Building Award


    2023
    Sales Award #11
    Team Building Award
    Leadership Award

  • 2022
    Sales Award #13
    Team Building Award
    Leadership Award

  • 2021
    Sales Award #15
    Team Building Award
    Leadership Award

  • 2020
    Australian Top 25
    Sales Award #5
    Incentive Trip

  • 2019
    Australian Top 25
    Sales Award #11
    Leadership Award

  • 2018
    Australian Top 10
    Incentive Trip Achiever
    Top 10 Sales & Recruiting

  • 2017
    Australian Top 10 #6
    Global Top 100
    Incentive Trip Achiever

  • 2016
    Australian Top 10
    Incentive Trip Achiever
    Leadership Award

  • 2015
    Incentive Trip Achiever
    $40K Sales Award
    Recruiting Award

  • 2014
    Leadership Award
    Recruiting Award
    Incentive Trip Achiever

  • 2013
    Leadership Award
    Incentive Trip Achiever
    Sales Achiever's Award

  • 2012
    #2 Leadership Award
    Incentive Trip Achiever
    #6 Demonstrator of Year

  • 2011
    #1 Leadership Award
    Incentive Trip Achiever
    #7 Demonstrator of Year

  • 2010
    #2 Leadership Award
    Incentive Trip Achiever
    #16 Demonstrator of Year

  • FREE TUTORIAL BUNDLE WITH $50 PURCHASE

  • Recent Posts

  • Meta

  • Stampin' Up! 2025-2026 Annual Catalogue
    6 May 2025 - 4 May 2026
    View Online | Shop Online
  • Join Stampin' Up!

  • Join to save money | Join to make money
  • Amazing places we've visited thanks to Stampin' Up!'s Incentive Trip program*

  • Mediterranean Cruise 2016
  • * Legal disclaimer: I have achieved the awards and recognition listed above, but this is not representative of typical Stampin’ Up! demonstrators. The level of sales to achieve this result requires significant work and is accomplished by a substantially small percentage of Stampin’ Up! demonstrators.


  • Popular Posts

  • The Fine Print

  • All content, including designs, concepts, text, and photographs are COPYRIGHT ©2026 Simone Bartrum, unless otherwise stated. I only use Stampin' Up!® products, so all stamped images are COPYRIGHT Stampin' Up!. As an independent demonstrator for Stampin' Up!, the content of this site is my responsibility. The use of and content of the classes, services, or products offered on here is not specifically endorsed by Stampin' Up!.